Wednesday, July 17, 2013

Cake Chronicles pt 5

Hi. I had to take a long break from posting (and baking!) after pulling off the wedding cake. I know you've been anxiously awaiting the finale of the Cake Chronicles series, so here we go :)

As you may recall, I needed to make three cakes for the 300-person wedding: a big tiered chocolate cake, a vanilla sheet cake, and a carrot cake sheet cake. I split the baking into two weekends. Over memorial day weekend, I baked the tiered wedding cake. The following weekend, I baked the two sheet cakes. All in all, I think I spent around 16 hours baking and assembling all three cakes. This is serious business, people! (This shows how much I love you, Heather!!) It's no wonder professional bakers charge so much for their cakes! Now, to be fair, I don't have multiple ovens, or even multiple pans, so each layer had to go into the oven on its own, which means for a 3 tiered cake, that was 3 rounds of 3-pan baking, and then 4 rounds of sheet cake baking. Plus washing and preparing the pans before each round. The baking probably took the most time!

I didn't take any pictures of the chocolate cake baking, but here are some of the carrot cake!

Carrots processing for the batter
 For the carrot cake, I used my favorite carrot cake recipe, omitting any nuts and raisins. I used my engineering degree math skills to determine that for a 2-layer sheet cake, I would need 3 batches of the recipe (which normally makes enough batter for two 9-inch round pans). I made 1.5 batches at a time because I only have one sheet pan.

Carrot cake batter!
 After baking nine layers of chocolate cake (three 14" squares, three 10" squares, and three 6" squares), and four layers of sheet cake (two carrot, two vanilla), I put everything in the freezer (and...nothing else). I used creative stacking techniques to make sure it all fit! The freezer door piece posed a problem, so I had to raise the big cakes to clear the door shelf that stuck out on the bottom. But everything fit, and it gave me a great excuse to clean out my freezer!! The 14" square tiers are stacked on the right side, the layer cakes on top, and the 10" and 6" tiers on the bottom.

Cake for 300 people in my apartment freezer!
 On Thursday night, I flew home from my job in Portland, and started the frosting component for these cakes! Here are the ingredients: buttermilk, cream cheese, strawberries, sugar, maple syrup, and lemon juice. Not pictured: LOTS OF EGGS.

Frosting ingredients!
I made swiss meringue buttercream for the big tiered cake, and colored it VERY light pink. And I made strawberry swiss meringue buttercream for the vanilla sheet cake, and maple cream cheese frosting for the carrot cake. Here is the swiss meringue buttercream starting! Yes, that is 10 sticks of butter you see. I was making a LOT of frosting!!

Egg whites heated over simmering water, and frozen butter thawing.
A pro-tip: if you have frozen butter (or frozen anything) it thaws significantly faster if you place it on a metal surface, like a baking sheet, rather than a counter. The metal conducts heat and thaws the frozen items much faster than a counter-top can. How's that for an engineering degree? :)

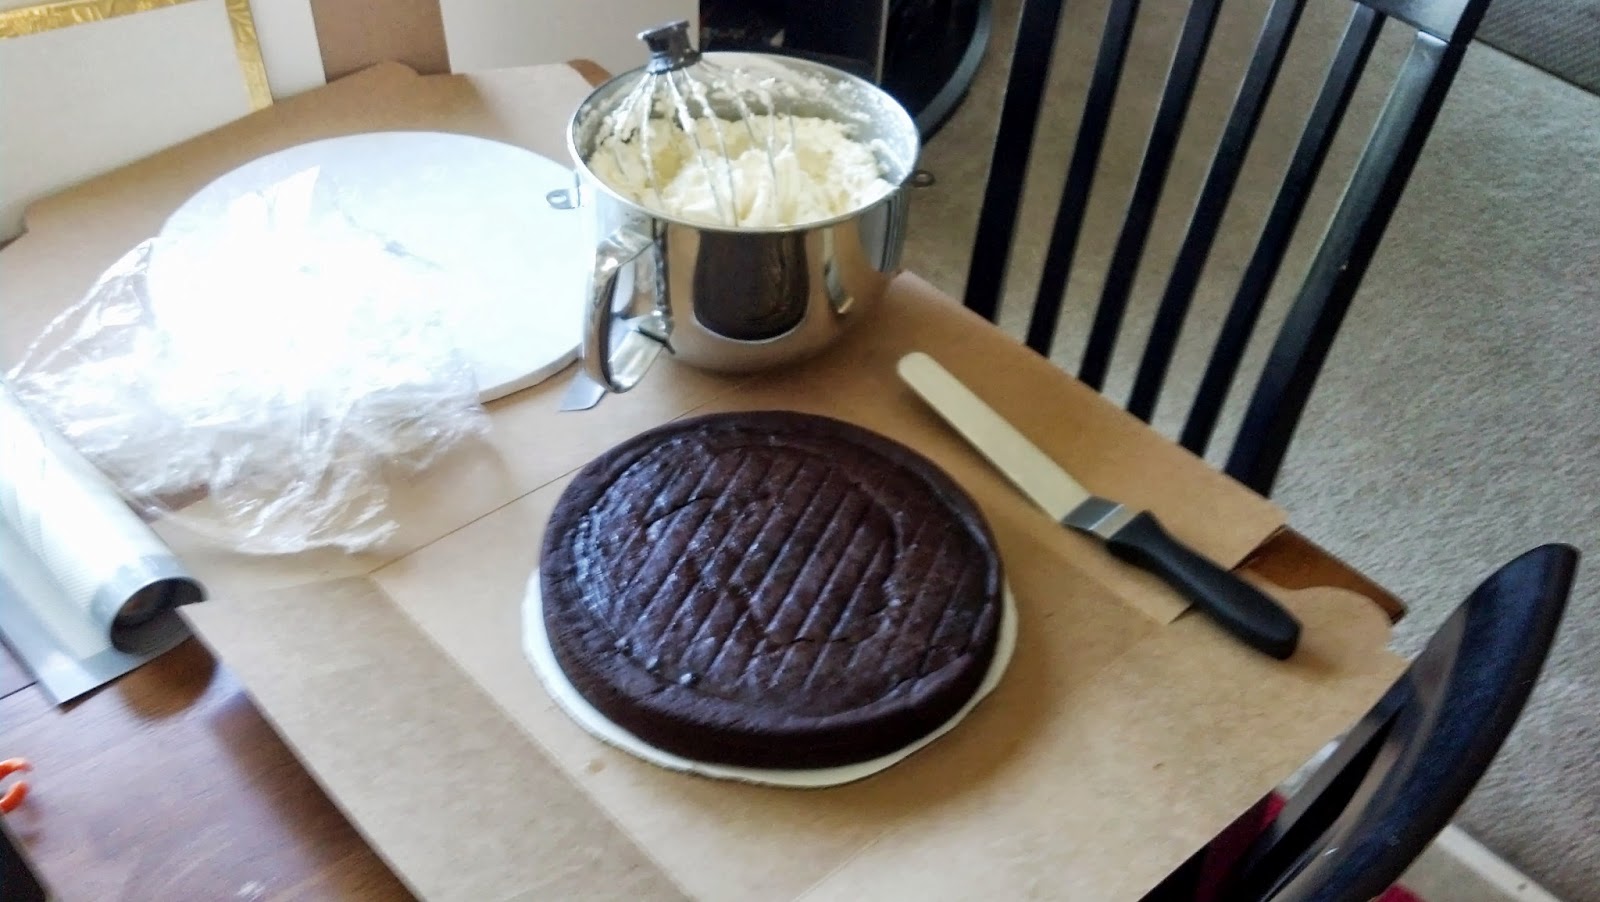
Time to assemble! Here is the big 14" layer. First, I leveled the layers, and then I spread a centimeter or so thickness of frosting on the layers (not a technical measurement... it may have been 1/4 inch...but it was enough to be a nice layer between the cake layers!). Also - I always frost frozen cakes. They are so much easier to work with, and as long as you leave plenty of time to defrost (overnight is best) then you're fine!

Frosting the cake
 I just used a plain white meringue buttercream for the filling and crumb coat (thin layer on the outside of the cake) because I would be covering the cake in pink icing later. Here is the 10" cake filled and the start of the crumb coat!


Crumb coat
 Once I filled and crumb-coated each of the three tiers, they went into the fridge overnight.The next morning (Friday) was the big frosting day! I started by making the pink buttercream for the big tiered cake. I made another batch of swiss meringue buttercream and put a few drops of red food coloring to turn it a light pink. FORTUNATELY, I had plenty of frosting. If I had to make another batch, I have no idea how I would have matched the color. I did count how many drops I used...but color matching is hard! Make more frosting than you need!!

Pink frosting ready for the cake!
 When you're making a large tiered cake, you need to use dowels to support the tiers. I ordered these paper dowels to use and cut them to the height of my cake. Here's where I nearly encountered disaster. I DID NOT MEASURE THE DOWELS. I can't believe that I did this, but I was in a big hurry, and I laid the dowels next to each other and cut them to what visually was even. However, later in the day when I was stacking the cake at the venue, it was clear that the dowels were slightly different heights, and the cake was lopsided!! Luckily I had extra frosting and was able to put frosting on the lower side to even it out, but it was NOT something I wanted to have happen, and I really lucked out that I was able to fix it. Please measure your dowels and don't trust that they "look" even. A slight difference can really throw off the tiers :(

Dowels going into the cake
I frosted the cake with pink frosting, and added a strip of burlap and lace to the bottom of each tier. Each tier was on its own cake board, and went into its own cake box and back into the fridge while I made the frosting for the sheet cakes.

For the vanilla sheet cake, I made a strawberry swiss meringue buttercream. This is the exact same buttercream recipe that I used for the chocolate cake, but I pureed strawberries and poured the puree into the finished buttercream and mixed it in. I didn't strain the puree, because I liked the look of the seeds in the frosting. Plus, this was not a cake that would be on display! I also sliced some extra strawberries to go in the middle of the layers :)

Strawberry cake being frosted!
After the strawberry cake was done, I made the maple cream cheese frosting. I was WAY overzealous on the ingredients for the frosting. For whatever reason, I thought I would need 5 batches of frosting for this cake (even though I only made 3 batches of batter!) so if you are in need of cream cheese, I have plenty in my fridge :) I ended up only making 3 batches of frosting, and still had tons left over.

Carrot cake being frosted!
And here is the finished carrot cake!

Finished carrot cake!
I boxed up the two sheet cakes and packed up the car to go down to Clovis. I was planning to take the cakes directly to the venue, where they would be refrigerated overnight and I could assemble the tiered cake in the morning before the wedding. As we were driving to Clovis, I got a phone call from my friend telling me that there was no refrigerator space at the venue! So my mom came to the rescue and had me take the cakes to her office, where they were stored in a big commercial refrigerator. Thanks, Clovis Unified District Office! :)

The day of the wedding was 100*F in Clovis...which means certain death for buttercream frosting. Luckily there was an air conditioned room at the venue. We went out to the venue and I got to stacking the cakes. As I mentioned previously, I had a little scare with the uneven dowels (ugh) but was able to fix it and the cake came out beautifully!!

The cake!
 The florist saved some flowers for me to put on top of the cake, and they were really beautiful!

Burlap and Lace
 Heather ordered this really cute custom wooden cake topper. I hope she saved it! :)

Heather + Jonathan
 Congrats to the beautiful bride and handsome groom!!!

my best friend is married!!!!
I've taken a full month off baking after these three big baking projects, but look forward to more delicious things soon!

Read the rest of the Cake Chronicles Series:
(1) Cake Chronicles
(2) Cake Chronicles pt 2
(3) Cake Chronicles - Intermission
(4) Cake Chronicles pt 3
(6) Cake Chronicles pt 5 (you're here!)


Wednesday, May 29, 2013

Cake Chronicles pt 4

It's time for cake number 2 of the big baby shower weekend! I assembled and decorated this cake on Saturday morning before heading to the shower in Clovis, so this cake would have a full day to defrost in the fridge before the shower on Sunday. This dinosaur cake turned out to be BIG.  I made two sheet cake layers, one vanilla and one chocolate, and frosted them with green swiss meringue buttercream frosting. As usual, I started with the first layer straight from the freezer, but I put it directly onto the nice cake board. I always cover the edges with foil so that I can frost the cake, then remove the foil once I'm finished and I don't get any frosting on the cake board!

first layer in the cake box, on the foiled cake board
Once I put a coat of frosting on top of the first layer, I stacked the next frozen layer on top.
 
Two layers stacked and ready for a full frosting coat
I actually ended up using ALL of the green frosting for the first coat, and had to make a new batch for the grass. I couldn't believe how big this cake was! I decided to make just half a batch of frosting for the grass, sure that it would be enough. To make the grass, I used a grass tip and piped it in rows all over the top of the cake. My friend Viviana helped me pipe half of it because my hand got really tired!!

Piping the grass
About two-thirds of the way through the grass, it was clear that there wasn't going to be enough frosting to finish the whole thing. I tried to make another batch, but colored it WAY too dark green, and got really frustrated. Then my friend suggested that I use some of the leftover fondant to cover a big area - so genius!  I rolled out some leftover fondant from the western cake, and made a big dinosaur egg! Then I had just enough frosting to cover the remaining portion of the cake :)

Covered cake!

I also used 4 containers of piroutte cookies to make the "fence" around the cake. It was fun breaking the pieces to different heights and eating the scraps :)  Then I put the toy dinosaurs on top, and voila! The cake was finished!  Here is the final product!

Dinosaurs roaming

Finished cake!
Everyone loved this cake, too! It was funny to see discarded plates - people definitely had preferences for chocolate or vanilla cake, so I'm glad I made both! We ended up with plenty of leftovers for people to take home, as well. Congrats mama!! Aunty Erin can't wait to meet this little dude!

Happy mama-to-be!
Read the rest of the Cake Chronicles Series:
(1) Cake Chronicles
(2) Cake Chronicles pt 2
(3) Cake Chronicles - Intermission
(4) Cake Chronicles pt 3
(5) Cake Chronicles pt 4 (you're here!)

Cake Chroncles pt 3

This past weekend was showtime for two of the three large cake projects. On Friday, I did the assembly of the western cake. I had planned to assemble both the western and the dinosaur cake, but I got a little caked-out and decided it would be ok to push the dinosaur cake assembly to Saturday morning before I left for Clovis. To start the western cake assembly, I made a big batch of swiss meringue buttercream frosting (it really is the best!).

yum frosting!
After the frosting was made, I needed to fill the cake. First I took the cake from the freezer and put it on a cake board, directly into the cake box (since I would be transporting it to Clovis). I find it easiest to work directly in the box, so I don't have to move the cake once it's finished!
ready for a layer of frosting!
Once I frosted the top, I put the other frozen layer on top, and gave the whole thing a quick crumb coat (thin coat of icing). The cake was to be covered in fondant, after all, so I didn't need to use a whole lot of icing, or even make it look nice :)


before frosting the sides
I didn't take a photo of the cake with it's full coat of frosting, but just imagine that cake above with a thin layer of frosting on the sides. Now we're ready for fondant! On the same day that I baked the cakes, I made a big batch of fondant (first time ever!) using Annie's recipe. I colored about 40% of it red, and left 60% of it white. I kept it wrapped up in plastic wrap, placed in a ziplock bag for the two weeks until I needed to use it. I love when things can be made ahead of time!  Since I started with the bottom layer, I took the white fondant and rolled it out to about 1/8 inch thickness (totally imprecise, as you can see in the photo below, but it worked....mostly).
fondant rolled and ready for the cake
I rolled the fondant on my rolling pin, and then unrolled it over the cake. As I've said, this was my first time every working with fondant (I've never even used store bought! I really hate the stuff, but this homemade kind actually tasted ok), so I did a couple of things wrong. First, as you can see below, I definitely did not roll it into a perfect circle. or perhaps large enough. Ideally I would have had a lot hanging over the edges so I could trim it and it would fit perfectly on the cake. I had to do a bit of smoothing magic... Also, I read a tutorial on how to smooth the fondant down onto the cake, and seriously, that was NOT easy, and it did not work very well.
pre-smoothing
I'm going to chalk this up to my lack of experience with fondant, but I had to do some folding and cutting of the fondant to make it lay flat on the cake, so I had several seams. LUCKILY, I had a way to cover up those imperfections... cow spots!


post-smoothing (and I photographed the 'good' side)
For the cow spots, I purchased a pre-made fondant set from Michaels. My experience with coloring frosting for sugar cookies led me away from trying to color my own black fondant (making white frosting a true black is HARD!) Also, this pack of fondant had both black and browns, which I'd need for the rope! So it worked out.  I rolled the black fondant out and free-cut a bunch of cow spots. Then I placed them strategically over any rips, seams and wrinkles on the cake!

cow print strategically covers flaws :)
The bottom was all finished!  Then I had to repeat the process with the top. Unfortunately, I did not have the same kind of opportunity to cover flaws in the fondant with the top, because I wasn't using any spots (or any fondant decor) on the top tier!  So I tried REALLY hard to roll the red fondant out in a big nice circle, and made it as flat as I could. There were still several places where I had to rip and cut the fondant to make it lie flat on the side of the cake... I really don't know how to get around that, but I guess it will come with practice (if ever...). But I did strategically pipe the paisley bandana details along cracks to disguise them as best as I could! If people looked really closely at the cake, they could see all of the problems, but most people didn't :)

top tier ready to go!
I bought a little sheriff's badge to use on top, and I think it turned out really cute!  The layers sat in their cake boxes overnight in my fridge to thaw out, and the following morning I drove the 3 hour trip down to Clovis and blasted the AC in the car so that the cakes would last :)  Once I got to the party location, I rolled out the brown fondant from the Michael's multi-pack and created a "rustic" rope to go around the top and bottom of the cake tiers (covering the cake boards). Rustic, because that fondant was actually really hard to roll out nicely, and broke a LOT. But it fit the theme as a rustic western rope :) I also bought a nice cake board to sit the whole thing on, and Ashley's sisters had a really cute table set up with a checkered tablecloth and a bandana for the cake! Here is the final product!

The final product!
Those boots are actually Trevor's from when he was little!
Overall, I am really happy with the way the cake turned out. Fondant was HARD to work with, but fortunately I could cover up mistakes fairly well (I don't know how professional bakers make their fondant look so smooth and perfect!!) and everyone raved about how good the cake (and fondant!) tasted. People even told me that they are not fans of eating cake, but loved this one. Total success :)  Congrats Trevor and Ashley! I can't wait to meet Davin!!

Parents-to-be!

Read the rest of the Cake Chronicles Series:
(1) Cake Chronicles
(2) Cake Chronicles pt 2
(3) Cake Chronicles - Intermission
(4) Cake Chronicles pt 3 (you're here!)
(5) Cake Chronicles pt 4
(6) Cake Chronicles pt 5

Tuesday, May 14, 2013

Cake Chronicles - Intermission

It's about to be baby shower weekend! I'm gearing up for a fun-filled day on Friday of decorating both baby shower cakes (see descriptions here). But as I am out of town for work, aside from cake planning, I've been prepping for these baby showers in other ways :) First, I picked up some amazing baby Nikes for both of the mamas! I'll post pics after the showers to keep the surprise.  Second, I am also in charge of party favors for the second baby shower, and I made them last night :)

I went to Michaels and got dinosaur stickers, ribbon and clear baggies, and filled them with mints, hersheys kisses, and bubbles!
the supplies
 It took about an hour to make and fill forty baggies, but it was a fun project to do while watching Netflix in my hotel room. I think they turned out to be very cute!

finished favors!
I still need to figure out what is going to go on top of the cakes. I need to find toy dinosaurs for the sheet cake, and either a toy cowboy hat or toy boots to go on the cowboy cake. Fortunately, I have a couple of days left to search!

Read the rest of the Cake Chronicles Series:
(1) Cake Chronicles
(2) Cake Chronicles pt 2
(3) Cake Chronicles - Intermission (you're here!)
(4) Cake Chronicles pt 3
(5) Cake Chronicles pt 4
(6) Cake Chronicles pt 5

Wednesday, May 8, 2013

Cake Chronicles pt 2

Continuing the series on the giant cake project I am attempting, I am proud to announce that (some of) the cakes are baked!  Following my cardinal rule of large cake projects, I plan and prepare as far in advance as possible. I like to bake the cakes themselves 2-3 weeks before the "big day" so that when the event day comes, stress levels are minimal, and if anything goes wrong, there is plenty of time to make it right!

Last weekend (two weeks before both baby showers) I baked both baby shower cakes. One cake is a two-tiered, round chocolate cake using my favorite chocolate cake recipe of all time, from the best cake book in the world, Sky High. I made two layers per tier: one tier is 12" round, and the other is 8" round.  The Sky High cake book provides recipes for triple layer cakes, 6, 8, and 10" square. I used a single recipe (the 10" square version) and it made the perfect amount of batter for one 12" round and one 8" round, which I baked at the same time.  If you're keeping score at home, this means I made two batches of batter, and did two rounds of baking, to get all four layers. According to this sizing guide, this should be enough cake for ~80 people. Although as I type this, I'm kind of worried that I won't have enough cake... we'll see.

The other cake is a sheet cake. I made one layer chocolate, using the same 10" square recipe which was plenty for a sheet cake - yay! I also made one layer of buttermilk vanilla, which comes from the same cookbook, although here's a smaller version of it already on the web. I baked the 12" round recipe which was enough for the sheet cake, but the batter was too much for my 7 qt mixer!! I had to dump it into a giant bowl and mix in 14 eggs by hand.....yeah that's an experience I don't want to repeat.

So to recap, I made three large batches of chocolate cake batter, and one large batch of vanilla cake batter.  Four rounds of pans in the oven later, all of the cakes were baked!  I wrapped them in triple layers of plastic wrap, put them on cake boards, and put them nicely into the freezer, where they will wait for May 17th!

I didn't take any pictures of the actual cake process (oops), but here are some before/after pictures:

Shopping for cake pans at the restaurant supply store in Oakland

Post-visit to Costco: giant bags of flour, sugar, powdered sugar, eggs, butter, cinnamon, vanilla, buttermilk and cocoa powder

Cakes wrapped and stacked in the freezer

Read the rest of the Cake Chronicles Series:
(1) Cake Chronicles
(2) Cake Chronicles pt 2 (you're here!)
(3) Cake Chronicles - Intermission
(4) Cake Chronicles pt 3
(5) Cake Chronicles pt 4
(6) Cake Chronicles pt 5

Monday, May 6, 2013

Cake Chronicles

I am about to embark on a few very large cake projects, and I want to document this process so I can look back one day and remember how absolutely crazy I was :)  In the span of a month, I have offered to make cakes for three very important events. Here's the rundown:
  • May 18: baby shower for one of my best friends. There will be 80-100 people at the baby shower (can you tell how loved that baby will be?) and the cake will be chocolate with the possibility of fondant (cowboy theme). I have never made or worked with fondant. Photo inspiration: http://goo.gl/AKMhE
  • May 19: baby shower for another dear friend. There will be 40-50 people at this shower. It will be a dinosaur cake. I have no idea what that means yet, but I'll have to figure that out within the next two weeks! Also the cake will be a yellow cake, with buttercream frosting. Photo inspiration: http://goo.gl/kq4ht
  • June 8: my best friend's wedding. There will be 300 people at the wedding. This requires a lot of cake. I plan to make one big "show" cake (three tiers, chocolate cake, pink buttercream frosting), and two sheet cakes to keep in the kitchen (one carrot cake, and one vanilla cake with strawberry lemon buttercream). Photo inspiration: http://goo.gl/p55xZ
The location of each event is also important. The baby shower on the 18th is in Fresno, the baby shower on the 19th is in Oakland, and the wedding on June 8 is in Clovis. Aside from the Oakland shower, the travel time to Fresno/Clovis is 3 hours, which means I'll need to transport the cakes long distance.  Here's the game plan:
  • Bake the baby shower cakes in advance and freeze
  • On Friday May 17th, decorate both cakes
  • On Saturday May 18th, drive to Clovis with the big cake, leave the other cake in the fridge in Oakland.
  • Weekend of June 1, bake the wedding cakes
  • On Friday June 7, drive all the wedding cakes to Clovis.
Next up - baking the cakes!

Read the rest of the Cake Chronicles Series:
(1) Cake Chronicles (you're here!)
(2) Cake Chronicles pt 2
(3) Cake Chronicles - Intermission
(4) Cake Chronicles pt 3
(5) Cake Chronicles pt 4
(6) Cake Chronicles pt 5
Related Posts Plugin for WordPress, Blogger...