Monday, April 12, 2010

Japanese Goodness

My recent hiatus from Pacific Thyme actually has a good excuse - I just got back from 10 days in Japan!  Can I tell you how much I love Japanese food?  Everything was SO delicious!  Here is a glimpse of the goodness that I experienced:

First, I had the best and freshest sushi ever at Tsukiji Fish Market in Tokyo.  The fish was literally in the water a few hours prior to being in my tummy :)


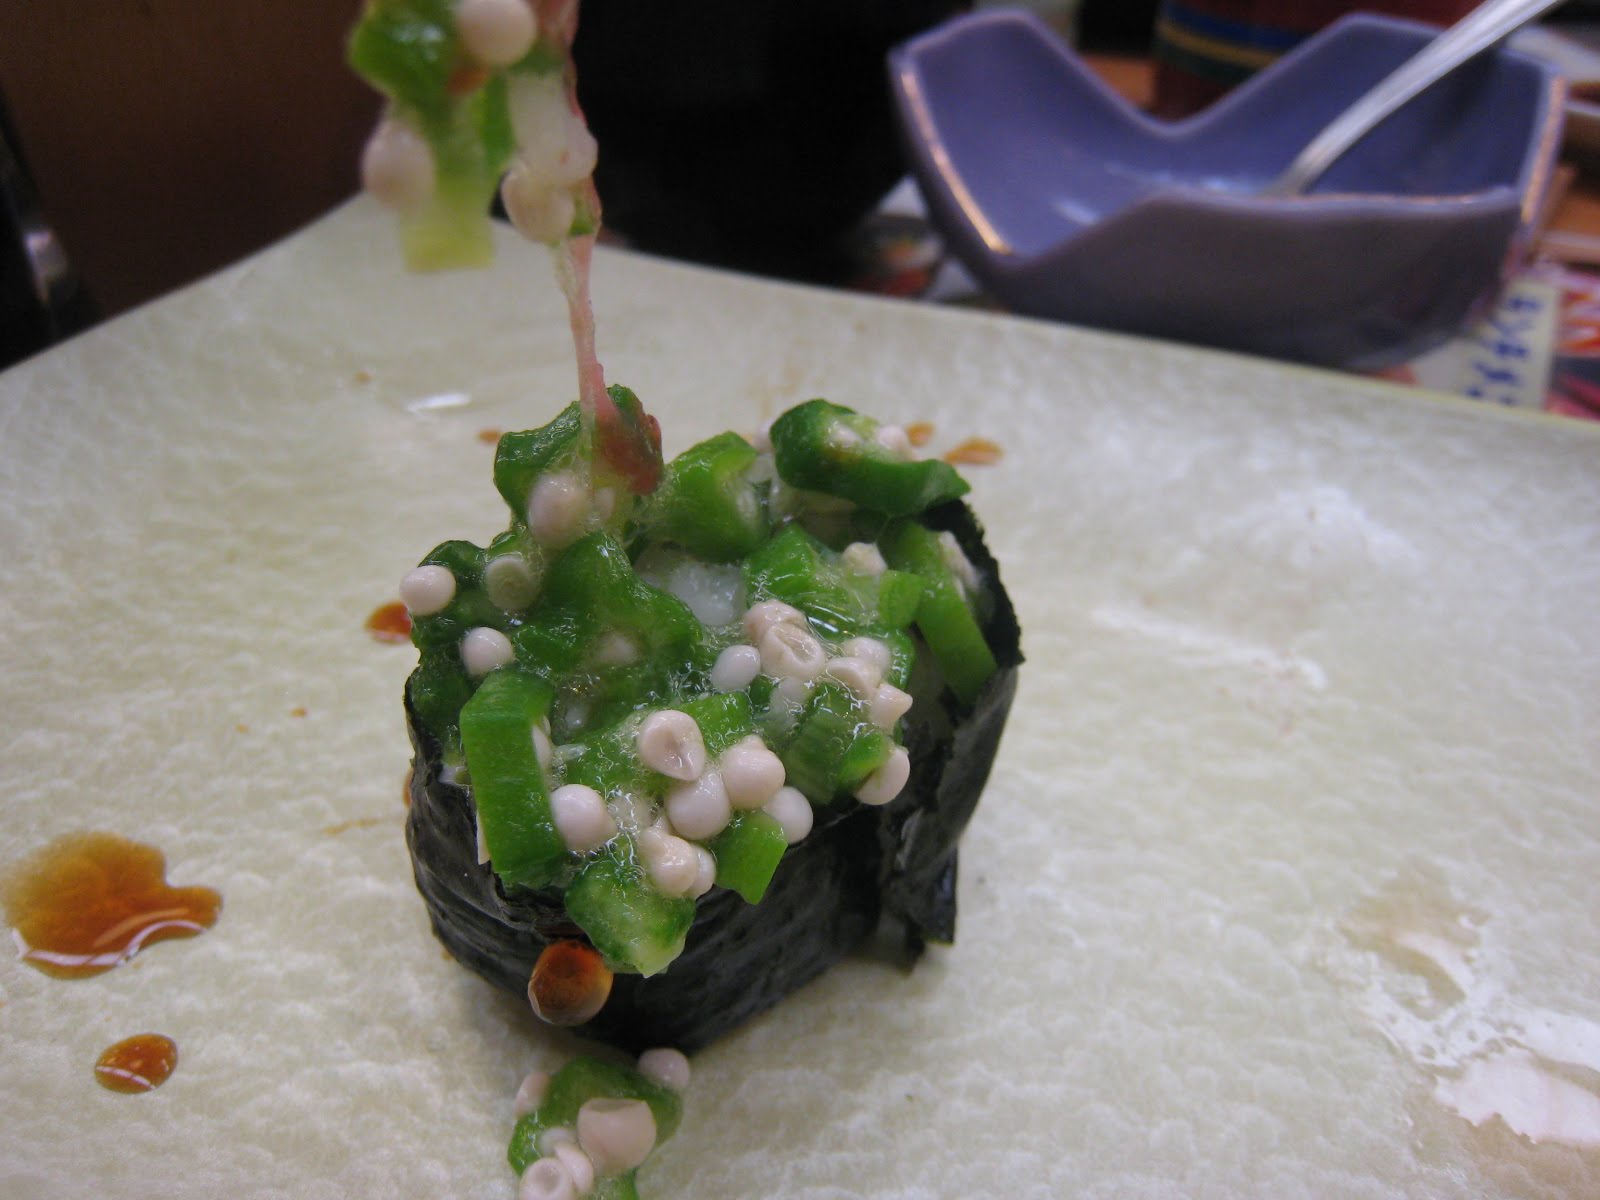
We ate all of the sushi except for this one: it was super goopy and nasty.
Here are some pictures from the fish market -- baby octopus, yummy ;)

Eel swimming in their own blood?  Ewwww

More octopus tentacles...mmm

In the Kansai region (Nara/Kyoto), a favorite local food is Okonomiyaki.  It's an egg pancake with toppings. This is egg stuffed with noodles and beef, with ketchup and mayonnaise spread on top.  SO GOOD!

Traditional okonomiyaki: we ate beef (gyu) and octopus (tako) as toppings for the pancakes.  And of course, lots of ketchup and mayonnaise.

McDonalds in Japan has a dollar (or 100 yen) menu.  One of the delicious items is Shaka Shaka Chicken.  To put it simply, it's a breaded chicken breast in a bag, and you add a flavor packet to the bag (either cheese, black pepper, or lemon), close the bag, shaka shaka, then enjoy your flavor-coated chicken!


One day in Ueno Park, we decided to try some of the street fare: Octopus Balls...but beware...these balls of batter and tentacles were nasty.  It was probably because the batter was not cooked through, but they had such a goopy texture that they were hard to pick up and hard to eat!  The tentacles were good though, so those were picked out of the batter and eaten :)


Here is some more street fare:  fish on a stick!

If you know me, you know that I love pancakes.  So when I saw pancakes in a bag at the 7/11 in Tokyo, I had to get them!  Mmmm pancakes!

RAMEN -- super delicious!  These are all of the toppings to put into my steamy bowl of broth and noodles.

Ramen is so yummy!  I got soy sauce broth and all of the toppings :)

And last but best by far: Kobe Beef.  For all of the money spent on this piece of meat, I can't even do it justice with a description.  Words do not express how amazing this beef is.  It melts in your mouth.  It makes you never want to eat another steak again.  Nothing can compare to how awesome this steak was.  Simply put, WOW!

I also loved eating katsu, shaved ice, onigiri (well, when I got ones with fish that I like inside), ten-don, and yoshinoya!  Mmmmm such amazing food!

On another note, Eunice, who was introduced through last post, and Tony, who has made an appearance on the blog before, will both be contributors to Pacific Thyme.  I am happy to have them aboard, and look forward to tales from their kitchens!

Wednesday, March 24, 2010

Soft and Chewy Molasses Spice Cookies

So I have always envied those who have a cooking blog, for their dedication and their creativity. I'm definitely a purveyor of a myriad of blogs and I'm one of those that have lots to catch up on my RSS feed. But I'm delighted that Erin has let me guest blog!

I love baking cookies and I'm one that likes those that are chewier. I guess I feel like I don't lose any of the sugary goodness with crumbs that could potentially get away. I made these cookies for the first time back in December when I saw the recipe in Cook's Illustrated. I was really surprised by the black pepper but it works surprisingly well! Maybe its a recipe fit for the holidays and winter months, but I say that molasses and spice are year-round ingredients!

These ones were baked at my friend Libby's house; Concord had lovely sunlight and made for some good shots!


Soft & Chewy Molasses Spice Cookies
from Cook's Illustrated
  • 1/3 cup sugar, plus 1/2 cup for rolling
  • 2 1/4 cups all-purpose flour
  • 1 teaspoon baking soda
  • 1 1/2 teaspoons ground cinnamon
  • 1 1/2 teaspoons ground ginger
  • 1/2 teaspoon ground cloves
  • 1/4 teaspoon ground allspice
  • 1/4 teaspoon ground black pepper
  • 1/4 teaspoon salt
  • 12 tablespoons (1 1/2 sticks) unsalted butter, softened
  • 1/3 cup packed dark brown sugar
  • 1 large egg yolk
  • 1 teaspoon vanilla extract
  • 1/2 cup molasses, light or dark (we used Brer Rabbit Full Flavor)

Center a rack in the oven and preheat oven to 375 F. Line 2 baking sheets with parchment paper or spray with oil. Place 1/2 cup sugar for dipping in a shallow, wide bowl.

Whisk flour, baking soda, spices, and salt in medium bowl until thoroughly combined; set aside.

In the bowl of a stand mixer fitted with paddle attachment or a hand mixer, beat butter with brown and granulated sugars at medium-high speed until light and fluffy, about 3 minutes. Reduce speed to medium-low and add yolk and vanilla; increase speed to medium and beat until incorporated, about 30 seconds. Reduce speed to medium-low and add molasses; beat until fully incorporated, about 30 seconds, scraping bottom and sides of bowl once with rubber spatula. Reduce speed to lowest setting; add flour mixture and beat until just incorporated, about 30 seconds, scraping bowl down once. Give dough final stir with rubber spatula to ensure that no pockets of flour remain at bottom. Dough will be soft.

Using tablespoon measure, scoop heaping tablespoon of dough and roll between palms into 1 1/2-inch ball. Roll ball in sugar to coat and set on prepared baking sheet, spacing cookies about 2 inches apart. (We fit 16 cookies on a cookie sheet). Repeat with remaining dough. Bake 1 sheet at a time until cookies are browned, still puffy, and edges have begun to set but centers are still soft (cookies will look raw between cracks and seem underdone), about 8-10 minutes (depending on your oven), rotating baking sheet halfway through baking. Don't overbake if you want the cookies to be soft and chewy.

Cool cookies on baking sheet 5-10 minutes and enjoy!

-Eunice

Tuesday, March 16, 2010

Chocolate Cream Pi(e)


Hi. I know it's been too long. Please accept my apology for temporarily abandoning ship. I've been doing a lot of thinking about this blog and my commitment to it. See, I'm very much a team player. I play on a soccer team, I work on teams as a consultant, and this blog was once a team effort. But with changes in life, the team dynamic disappeared. No one is on the other side to keep me accountable, to prod me to make sure that I am cooking, baking, photographing, and posting. And clearly, left to my own devices, I stopped. But don't worry, this is not at all a eulogy to Pacific Thyme. In fact, it is very much still alive, if merely dormant. Consider this a revival. And consider this chocolate cream pie my peace offering (believe me, with one taste, all of your problems will melt away and you will forget that I once abandoned you).


March 14th, 3/14 is one of my favorite holidays. Yes, for those of you not nerdy enough to recognize, it is Pi Day! A day where, for each of the past 8 years, my friends and I have gathered to celebrate all things mathematical, and enjoy some delicious pi(e). And this year was no exception. In fact, this year was a revival of Pi Day, too! My wonderful best friend and Pi Day co-founder, Tracie, had to miss the last two Pi Day celebrations (something about a trip to Ecuador and living in DC...but I'm not bitter, I promise!). But this year, she has moved back to the beautiful SF Bay Area and was able to once again join in the party!


I was killing some time at home on Saturday night before Tracie came over for a pre-Pi Day sleepover, and I decided to whip up this beauty: Chocolate Cream Pie. This pie was surprisingly quick to make. In fact, the directions recommended that I bake the shell, take it out to cool and while the shell is cooling, prepare the filling. But the filling was so quick to make, that the shell had barely cooled a few degrees! The directions then said: immediately pour filling into cooled shell. What was I supposed to do?! Ignore the "immediate" direction and wait for the shell to cool? Or ignore the "cooled shell" requirement and just pour my hot filling straight on in? Now I know that this may not seem like a big decision, but this is a Cook's Illustrated recipe we're talking about here. They've tested every possible way to make this pie, and have given really precise directions. And here I was, debating on how to disobey orders in the way that would least screw up the pie! I opted to ignore the "cooled shell" and decided to pour the filling right on in, then plop the whole thing in the fridge to cool overnight. The pie turned out fine :) In fact, it was quite possibly the biggest hit of the Pi Party, aside from the quiches Tracie and Tony made.


Everyone had a great time at the Pi Party, and all 6 pies were eaten up. Here are some pictures of our more creative apple and berry Pi(e)s!


Chocolate Cream Pie
from Cook's Illustrated, May 2001

Crust
  • 16 Oreos with filling, broken into pieces (or whole if you have an awesome food processor)
  • 2 tbsp unsalted butter, melted and cooled
Filling
  • 2.5 c. half and half
  • pinch salt
  • 1/3 c. sugar
  • 2 tbsp cornstarch
  • 6 large egg yolks
  • 6 tbsp unsalted butter, cold, cut into 6 pieces
  • 6 oz. semisweet chocolate, chopped (they recommended Hershey's Special Dark, which I used)
  • 1 oz. unsweetened chocolate, chopped (I used Baker's)
  • 1 tsp vanilla
Whipped Cream
  • 1.5 c. heavy cream
  • 1 1/2 tbsp sugar
  • 1/2 tsp vanilla
For the crust:
  1. Adjust oven rack to middle position and heat oven to 350 degrees.
  2. In bowl of food processor fitted with steel blade, process cookies until crumbs are uniformly fine. (Alternatively, place cookies in large zipper-lock plastic bag and crush with rolling pin.)
  3. Transfer crumbs to medium bowl, drizzle with butter, and use fingers to combine until butter is evenly distributed.
  4. Pour crumbs into 9-inch Pyrex pie plate.
  5. Press crumbs evenly onto bottom and up sides of pie plate.
  6. Refrigerate lined pie plate 20 minutes to firm crumbs, then bake until crumbs are fragrant and set, about 10 minutes.
  7. Cool on wire rack while preparing filling.


For the filling:
  1. Bring half-and-half, salt, and about 3 tablespoons sugar to simmer in medium saucepan over medium-high heat, stirring occasionally with wooden spoon to dissolve sugar.
  2. Stir together remaining sugar and cornstarch in small bowl, then sprinkle over yolks and whisk, scraping down sides of bowl, if necessary, until mixture is glossy and sugar has begun to dissolve, about 1 minute. (Here I went from sprinkle to dump the whole bowl...it worked out fine)
  3. Whisk yolks thoroughly in medium bowl until slightly thickened, about 30 seconds.
  4. When half-and-half reaches full simmer, drizzle about 1/2 cup hot half-and-half over yolks, whisking constantly to temper; then whisk egg yolk mixture into simmering half-and-half (mixture should thicken in about 30 seconds).
  5. Return to simmer, whisking constantly, until 3 or 4 bubbles burst on the surface and mixture is thickened and glossy, about 15 seconds longer.
  6. Off heat, whisk in butter until incorporated
  7. Add chocolates and whisk until melted, scraping pan bottom with rubber spatula to fully incorporate.
  8. Stir in vanilla, then immediately pour filling into baked and cooled crust.
  9. Press plastic wrap directly on surface of filling and refrigerate pie until filling is cold and firm, about 3 hours (or overnight)


For the topping:
  1. Just before serving, beat cream, sugar, and vanilla in bowl of standing mixer on low speed until cream is smooth, thick, and nearly doubled in volume and forms soft peaks.
  2. Spread whipped cream over chilled pie filling.

Happy Pi Day!
Related Posts Plugin for WordPress, Blogger...