Showing posts with label cookies. Show all posts

Monday, October 10, 2011

Easy Butterscotch Cookies


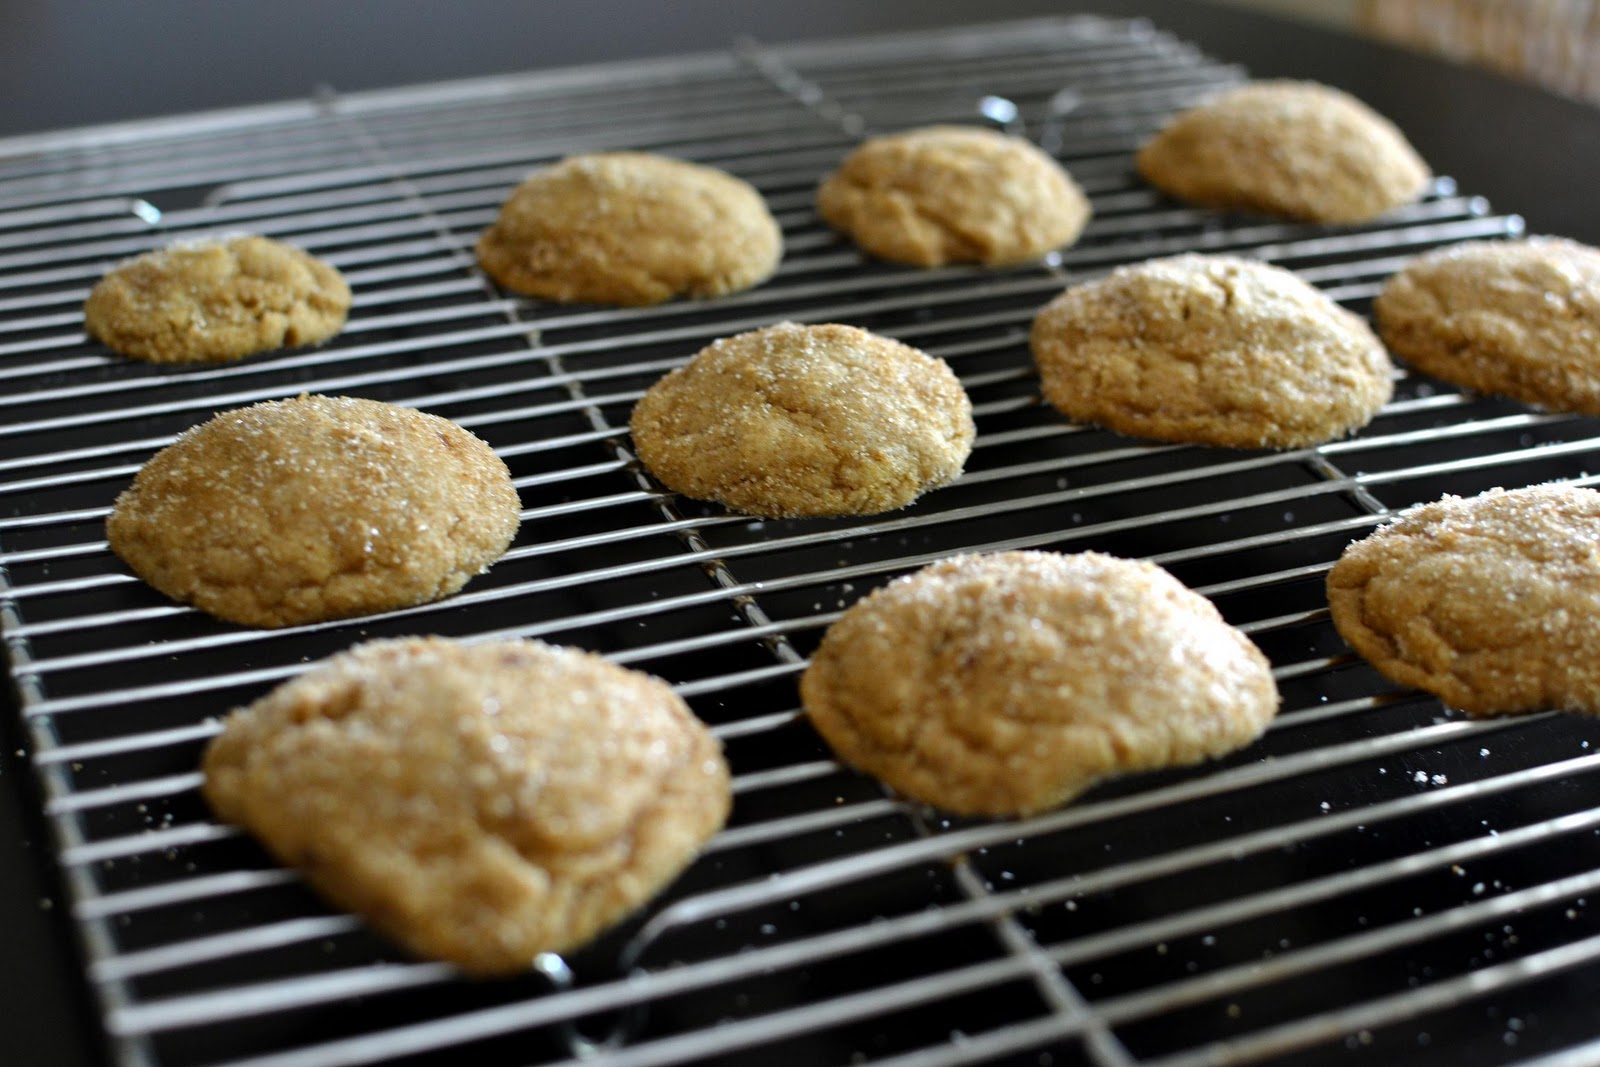
A very exciting thing happened this weekend: the digital camera that I purchased was delivered!!  I was very excited to photograph a new recipe, but I was house-sitting this weekend, which meant that I didn't have my usual supplies (read: no stand mixer...oh no!).  I actually welcomed this change - it was a chance to get back to basics in the kitchen...except with the addition of a new camera!


This recipe is very easy, and I'll bet that you have all of the ingredients on hand at this moment.  It doesn't require any ingredient that isn't a pantry staple (which is why it was perfect to whip up in another person's home) and just requires a big bowl and a sturdy spoon for mixing.  I really loved stirring the cookies together, then rolling them in sugar before baking. They bake up beautifully and are SO yummy!  They have an almost caramel flavor, with a very chewy interior with a crunchy sugary exterior.  Their aroma is pretty heavenly, too :)  Browning the butter is an extra step, but doesn't take any more effort, and makes these cookies oh so good...!  Make them soon and share them with friends (or kitties that you are watching for the weekend)!

sneaky kitty!

Butterscotch Cookies
adapted from Simply Recipes
Yield: Makes ~4 dozen

Ingredients
  • 12 tablespoons unsalted butter
  • 1 3/4 cups brown sugar (dark, if you have it)
  • 1/2 teaspoon salt
  • 1 egg
  • 1 egg yolk
  • 1 tablespoon vanilla extract
  • 2 1/2 cups all-purpose flour
  • 1/2 teaspoon baking soda
  • 1/4 teaspoon baking powder

Sugar Dredging
  • 1/4 cup dark brown sugar
  • 2 tablespoons sugar
  • Kosher salt or sea salt, for sprinkling* (reserve for sprinkling on top...do not mix in with the sugar)
*Do not use fine grain table salt (aka: iodized salt) as the flavor will be way off and unpleasant.


Directions
  1. Preheat oven to 375°F and line baking sheets with parchment paper.
  2. Sift together the flour, baking soda, and baking powder and set aside.
  3. Mix together the sugar dredging mixture in another bowl and set aside.
  4. Place butter into a thick-bottomed skillet over medium heat. The butter will foam a bit before subsiding.
    the butter is on its way!
    Once the butter takes on a tan color and begins to smell nutty take it off of the heat and pour it into a mixing bowl. (See Elise's tutorial on how to brown butter.)

  5. yum browned butter bits!
  6. Once the brown butter is in a mixing bowl , add the brown sugar and salt and mix.


  7. Add the egg, egg yolk, and vanilla extract and mix together.


  8. Add the flour mixture in three increments, being sure to really scrape down the sides and bottom of the bowl, but mix just until the flour is incorporated. The dough will be very thick.


  9. Take 1/2 to full tablespoon-sized pieces of dough (you can make them however big you like) and gently roll them into ball shapes.
  10. Dredge them in the sugar dredging mixture until well-coated.
  11. Place on the baking sheet and sprinkle with a little bit of the sprinkling salt (be reserved with the salt as very little goes a long way).


  12. Bake for 10-12 minutes or until the edges have browned a bit. Be careful not to over-bake. (I baked mine for 10 minutes) Allow to cool on the sheet for one minute before transferring to a wire rack to cool completely.


Tuesday, February 8, 2011

Sour Cream Sugar Cookies

I used to think that sugar cookies were only for Christmastime.  I used to make them with my mom on Christmas Eve, along with a gingerbread house.  We'd frost them and pour sprinkles on them, and put them out for Santa. But since reading Annie's tutorial on how to decorate with royal icing, I've discovered that sugar cookies can be for any occasion!


I had some girlfriends over for a Valentine's cookie decorating party - it was so much fun!  We made lots of icing colors and had sprinkles and just went to town decorating a ton of cookies and watching The Bachelor :)


I've tried several types of sugar cookies over the past year, but this recipe is my new favorite.  It is my Aunt Kathy's recipe, and everyone who has tried these cookies loves them!  I took a big batch into work today, and even people who said they don't normally like sugar cookies loved these!  So there you go - these cookies convert people.  You should whip up a batch!


Aunt Kathy's Sour Cream Sugar Cookies
[yield approx. 5 dozen cookies, depending on how big you cut them and how thick you roll them out. I rolled them to 1/8 inch]


Ingredients:

  • 3/4 c. butter
  • 3/4 c. shortening
  • 1 1/2 c. sugar
  • 1 c. sour cream
  • 3 egg yolks
  • 1/2 tsp baking soda
  • ½ tsp. salt
  • 1 tsp baking powder
  • 1 1/4 tsp vanilla
  • 6 c. flour
Directions:

  1. Cream butter, shortening, sugar in large bowl. Set aside.
  2. Add baking soda to egg yolks in a medium bowl.
  3. Combine sour cream, yolks and vanilla; mix well.
  4. In another bowl, sift salt, flour, and baking powder.
  5. Add flour mixture to creamed mixture, alternating with the sour cream mixture. (Aunt Kathy's note - this dough can get pretty crumbly at this stage, so don't be afraid to use your hands to mix it together!) 
  6. Roll out dough and use cookie cutters. (There is no need to chill the dough before rolling it out.  In fact, it makes it much harder to do so. I chilled my dough and ended up needing it to be warmer in order to roll it out. Just use a well-floured counter, and you'll be good to go!)
  7. Bake at 350 about 10 minutes depending on thickness.
  8. Decorate with royal icing.

Tuesday, October 19, 2010

Halloween Sugar Cookies


It's that time of year! Time for pumpkin recipes, fall soups and chilis, and of course, decorated sugar cookies!  This was my first time using this royal icing technique.  I've seen it everywhere: beautiful cookies with a beautiful matte sheen layer of icing, decorated in every possible color.  I was lazy and only wanted to use one color (ok, two if you count the normal white).  I followed Annie's tutorial on how to flood a cookie with royal icing, but basically, you take normal royal icing, pipe it along the edge of your cookie, then let it sit for about 30 minutes. Then take some of the icing, add a little bit of water to it, until it is thinner and runs off your spoon, and then "flood" the interior of the cookie, using a toothpick to help bring the icing to the edge.

I made these cookies pretty late at night, so I didn't take any pictures of the process :(  But it's really easy to make a cool spiderweb design: before flooding the cookie, take some of the thinner icing and put it into another container.  Color it with black food coloring, and then proceed to flood the cookies with the white icing.  After flooding, while the icing is still wet, put some of the black icing into a pastry bag with a tip attached, and pipe a "target" onto the cookies (as shown in my horrible MS Paint drawing below).


Then take a toothpick and drag lines from the center of the cookie, outwards, pulling the black circles into a spider web!  Let the icing harden overnight, and you will have beautiful spiderweb cookies!

Sugar Cookies
adapted from Annie's Eats

Ingredients:
  • 1 cup butter
  • 1 cup powdered sugar
  • 1 egg, beaten
  • 1 ½ tsp vanilla
  • 1 tsp salt
  • 2 ½ cups flour
Directions:
Cream butter. Add powdered sugar. Blend in egg, vanilla, salt and flour. Chill dough until firm. Roll to ¼” thickness on well-floured surface. Cut with cookie cutters. Place on greased cookie sheets. Bake at 375° for 8-10 min. Cookies should not brown. Frost and decorate when cool. Yields ~24 cookies.

Royal Icing
from Alton Brown

Ingredients
  • 3 egg whites
  • 1 tsp vanilla extract
  • 4 cups confectioners' sugar
Directions

In large bowl, mix the egg whites and vanilla with an electric mixer until frothy. Add confectioners' sugar gradually and mix on low speed until sugar is incorporated and mixture is shiny. Turn speed up to high and beat until mixture forms stiff, glossy peaks. This should take approximately 5 to 7 minutes.  Color if desired, and transfer to piping bags for use.


-Erin

Thursday, September 9, 2010

Macarons!


When you read as many food blogs as I do, you have been overwhelmed by everyone making macarons.  You've read horror stories (they didn't have feet! they cracked! they stuck to the pan!), you've been wowed by a rainbow of colors, and you have been seriously tempted to try making them yourself, but you are intimidated by how finicky they seem to be, and you also don't have a kitchen scale.  (Ok, so that last part is probably just me, but luckily I was able to borrow one quite easily).  But if you aren't totally wrapped up in the food blog community, you are probably thinking (as EVERYONE i gave these cookies to did) what the heck are macarons??

No, they are not macaroons. There is only one "o," and yes, it makes a difference :P

Macarons are a French cookie, known for their hard shells, merengue-like interiors, and of course, their variety of colors and flavors.  So, in a totally boring (yet totally delicious!) fashion, I picked chocolate for my first attempt at macarons.  They definitely didn't turn out perfectly, but I was really happy with the results anyway, and everyone thought they were delicious.  I took lots of pictures of the process so that you can follow along at home :)

Chocolate Macarons with Chocolate Ganache
recipe from Annie's Eats


Ingredients
For the macarons:
  • 110 gm blanched slivered almonds
  • 200 gm minus 2 tbsp. confectioners’ sugar
  • 2 tbsp. cocoa powder
  • 100 gm egg whites (from about 3 eggs), aged at room temperature for 12-24 hours (I aged mine for 3 hours, because I am super lazy and forgot to put them out earlier!....but they still turned out really well!)
  • 50 gm granulated sugar
For the chocolate ganache:
  • 1/2 cup heavy cream
  • 1 tbsp. unsalted butter
  • 1 tbsp. granulated sugar
  • 4 oz. bittersweet chocolate, finely chopped
  • (you can add 1 1/2 tsp espresso powder if you are a coffee lover.  i omitted this ingredient)
Directions:
1. Weigh the almonds, then pulse them in the bowl of a food processor until finely ground. Then add the confectioner's sugar and cocoa


2. In a large bowl, whip the egg whites on medium-high speed until foamy.


3.Gradually add the granulated sugar and continue beating until a smooth, shiny meringue with stiff peaks forms.


4. Add the ground almond mixture to the bowl with the meringue and quickly but gently fold together using a rubber spatula until no streaks remain.  You want to achieve a thick batter that ribbons or flows from the spatula when lifted. You may feel like you are over-mixing, but keep going until the batter really flows.


5. Line two baking sheets with silicone baking mats (if you have them...I have only one baking sheet and one silpat, so I employed the technique: "squeeze as many macarons as possible onto one silpat!" Then I put the remaining batter onto a small baking sheet lined with parchment paper).  Transfer the batter to a piping bag fitted with a plain wide round tip.  Pipe into small rounds on the prepared baking sheets (each round should be about 1-1½ inches in diameter), spaced about 1 inch apart (unless you use my squeeze technique, then really these macarons are about 1/4 inch apart, if that!).


6. Let sit at room temperature for about an hour to develop a hard shell.  During the hour of sitting, make the ganache: put the heavy cream, butter and sugar in a small saucepan over medium-high heat. Place the chopped chocolate in a small heatproof bowl. Bring the cream mixture to a simmer, remove from the heat and pour over the chocolate. Let stand 2 minutes, then whisk gently in small circular motions until the ganache forms. Let the mixture cool until it is thick.  (To speed chilling, transfer the bowl to the freezer or refrigerator and let cool, stirring every 10 minutes, until thickened.)

7. Preheat the oven to 300˚F. Bake for 8-10 minutes, depending on size [NOTE! I actually baked mine for 15 minutes, and wish I had baked them for 20, but some were starting to crack...  don't be afraid of baking them for longer than 10 minutes]. Transfer the pans to a wire cooling rack and let cool completely before moving the cookies. (get excited if your cookies have "feet" like the ones shown below!)


8. GENTLY remove the cookies from the pans. THIS IS A DIFFICULT PROCESS. Be prepared to lose a lot of cookies :( Mine stuck a LOT to the parchment paper, and many even stuck to the silpat. Here is a picture of the casualties:


Conversely, here are the cookies that were perfectly removed from the silpat (MUCH fewer! haha)


9. With a knife, spread the ganache onto one side of a cookie, and sandwich with another matching size cookie.


And guess what...those cookies with less-than-perfect bottoms...totally hidden under the layer of ganache!! Look at all of the cookies I salvaged! :)


Macarons

Wednesday, March 24, 2010

Soft and Chewy Molasses Spice Cookies

So I have always envied those who have a cooking blog, for their dedication and their creativity. I'm definitely a purveyor of a myriad of blogs and I'm one of those that have lots to catch up on my RSS feed. But I'm delighted that Erin has let me guest blog!

I love baking cookies and I'm one that likes those that are chewier. I guess I feel like I don't lose any of the sugary goodness with crumbs that could potentially get away. I made these cookies for the first time back in December when I saw the recipe in Cook's Illustrated. I was really surprised by the black pepper but it works surprisingly well! Maybe its a recipe fit for the holidays and winter months, but I say that molasses and spice are year-round ingredients!

These ones were baked at my friend Libby's house; Concord had lovely sunlight and made for some good shots!


Soft & Chewy Molasses Spice Cookies
from Cook's Illustrated
  • 1/3 cup sugar, plus 1/2 cup for rolling
  • 2 1/4 cups all-purpose flour
  • 1 teaspoon baking soda
  • 1 1/2 teaspoons ground cinnamon
  • 1 1/2 teaspoons ground ginger
  • 1/2 teaspoon ground cloves
  • 1/4 teaspoon ground allspice
  • 1/4 teaspoon ground black pepper
  • 1/4 teaspoon salt
  • 12 tablespoons (1 1/2 sticks) unsalted butter, softened
  • 1/3 cup packed dark brown sugar
  • 1 large egg yolk
  • 1 teaspoon vanilla extract
  • 1/2 cup molasses, light or dark (we used Brer Rabbit Full Flavor)

Center a rack in the oven and preheat oven to 375 F. Line 2 baking sheets with parchment paper or spray with oil. Place 1/2 cup sugar for dipping in a shallow, wide bowl.

Whisk flour, baking soda, spices, and salt in medium bowl until thoroughly combined; set aside.

In the bowl of a stand mixer fitted with paddle attachment or a hand mixer, beat butter with brown and granulated sugars at medium-high speed until light and fluffy, about 3 minutes. Reduce speed to medium-low and add yolk and vanilla; increase speed to medium and beat until incorporated, about 30 seconds. Reduce speed to medium-low and add molasses; beat until fully incorporated, about 30 seconds, scraping bottom and sides of bowl once with rubber spatula. Reduce speed to lowest setting; add flour mixture and beat until just incorporated, about 30 seconds, scraping bowl down once. Give dough final stir with rubber spatula to ensure that no pockets of flour remain at bottom. Dough will be soft.

Using tablespoon measure, scoop heaping tablespoon of dough and roll between palms into 1 1/2-inch ball. Roll ball in sugar to coat and set on prepared baking sheet, spacing cookies about 2 inches apart. (We fit 16 cookies on a cookie sheet). Repeat with remaining dough. Bake 1 sheet at a time until cookies are browned, still puffy, and edges have begun to set but centers are still soft (cookies will look raw between cracks and seem underdone), about 8-10 minutes (depending on your oven), rotating baking sheet halfway through baking. Don't overbake if you want the cookies to be soft and chewy.

Cool cookies on baking sheet 5-10 minutes and enjoy!

-Eunice

Monday, January 11, 2010

walnut brownie cookies


This was a bit of an oops. I tried to make these cookies out of Martha Stewart Baking Handbook this weekend for a friend's birthday. I think I've said before that I have a fear of cookies. Cakes are docile, sweet tempered, forgiving things. Cookies appear that way on the surface, but really they are temperamental, finicky and oddly time consuming. This view may not be totally defensible, and Erin has tried to convince me many times that cookies can be easy, it does explain why I'm a bit of a novice at them.


This recipe seemed very simple. And it was, until I got to the final step of adding flour. Then, in all my wisdom, I decided the batter seemed all too thin and SURELY needed more flour. So I added some. And then the whole thing got too dry, and the cookies were not melty and awesome like they COULD have been. They were alright to eat, but I'm determined to make them again soon and get it right. Of course, the walnut in chocolate combination was still divine. Mmmmm.


May you and your level-headed flour measuring fare better, my friends. Enjoy.

Walnut Brownie Cookies
from Martha Stewart Baking Handbook

9 ounces semisweet chocolate, chopped into 1/4 inch chunks
3 ounces unsweetened chocolate, coarsely chopped
6 tablespoons unsalted butter
1 cup sugar
3 large eggs
1/2 teaspoon pure vanilla extract
1 cup sifted all purpose flower
1/4 teaspoon salt
3/4 cup chopped walnuts

1. Preheat oven to 375 degrees. Line baking sheets with parchment paper.
2. In a heat proof bowl set over (but not touching) simmering water, melt 5 ounces of semisweet chocolate, the unsweetened chocolate, and the butter. Set aside to cool for five minutes.
3. With an electric mixer, beat chocolate mixture and sugar on medium until well combined, about 3 minutes, scraping down bowl as needed. Add eggs, and mix until combined. Beat in vanilla.
4. Add flour and salt, beat until just incorporated. Stir in chocolate pieces and walnuts.
5. Shape into two teaspoon-ful balls, and place 1.5 inches apart on cookie sheets. Bake, until edges are set but centers are soft, about 9 to 11 minutes. Transfer to wire rack to cool completely.


Tuesday, October 20, 2009

Pumpkin Butterscotch Cookies

I have the best mom in the whole world. After reading my rant about Safeway not carrying canned pumpkin, she showed up at my door with 3 cans of the delicious puree! How great is she? (p.s. Safeway totally has canned pumpkin now...I have evidence below). So of course, now that I am stocked with pumpkin, and October is quickly coming to a close (seriously, where did this month go?), it is time for another pumpkin recipe.

Here's the thing about pumpkin: it is a delicious food, but to me, I can never imagine doing anything with it besides plain ol' pumpkin pie. But pumpkin continually surprises me with the flavors that it pairs with. Pumpkin and chocolate had me skeptical enough, but pumpkin and butterscotch? That sounded like pure witchcraft -- and these cookies surely put a spell on me!

Now, as soon as the cookies came out of the oven, they were beautiful. Puffy, cakey, and oozing with butterscotch. I had to try one (ok three...) immediately, and Suzie walks into the kitchen, sees me double-fisting these cookies and all I could do was look at her sheepishly and offer her one. She took half a cookie, tasted it, experienced the same euphoria that I did, and then grabbed for the other half. These were some yummy cookies! I had thought that I would give these cookies to our neighbors as a thank you present...but after trying them, I knew that there was a time to be generous and a time to be selfish. Cookies this good bring out my selfish side: I was NOT sharing.


Pumpkin Butterscotch Cookies
Makes about 20 cookies
  • 2 c. flour
  • 1 1/2 tsp baking powder
  • 1 tsp soda
  • 1/2 tsp salt
  • 1 tsp cinnamon
  • 2 eggs
  • 1 c. sugar
  • 1/2 c. canola oil
  • 1 c. canned pumpkin
  • 1 tsp vanilla extract
  • 1 c. butterscotch chips
  1. Preheat oven to 325 deg F.
  2. Mix the flour, baking powder, baking soda, salt and cinnamon together in a bowl and set aside
  3. In a large bowl, using an electric mixer on medium speed, beat the eggs and sugar until smooth, about 1 minute.
  4. On low speed, mix the oil, pumpkin, and vanilla until blended.
  5. Mix in the flour mixture to incorporate it.
  6. Mix in the butterscotch chips.
  7. Use an ice cream scoop to scoop mounds of dough on baking sheets lined with parchment paper, spaced at least 2 inches apart.
  8. Bake for about 16 minutes, or until the tops feel firm.
  9. Cool on the baking sheet for 5 minutes, then transfer to a wire rack to cool completely (or eat immediately because they are SO good!)

Wednesday, October 7, 2009

Make Your Own Girl Scout Cookies (Samoas!)


I know what you're thinking - Girl Scout cookies should not be tampered with. These little colorful boxes of perfection couldn't possibly be improved upon...could they? Plus, it's not even Girl Scout Cookie Season! (January - March...but who's counting?)


But let me tell you - if you haven't learned enough already that things made at home are much better than store-bought, then get ready for Samoas. Or as I have always called them, Caramel deLites (it depends on where you live, apparently, what they are named...but they are the same delicious cookie). Caramel, chocolate, coconut and cookie - does it get any better?

This was definitely a time consuming cookie. A bit ambitious for a Tuesday night after soccer practice, but Wednesday was my company team's final game, and I wanted to bring something to help celebrate. So be prepared to spend a good couple of hours cutting out cookies, melting caramel and chocolate, and making delicious little replicas of the cookies we all know and love, except better because you made them! Just take your time and have fun with them - the results are worth it!

My roommate, upon trying the cookie, said "those are the cookies that God eats." Is there a better compliment than that? Come Girl Scout Cookie Season, it would be fun to do a side-by-side taste test... I will have to enlist my mom - Caramel deLites are her favorite!

Samoas (aka Caramel deLites)
Adapted from Baking Bites

Cookies
  • 1 c. butter, softened
  • 1/2 c. sugar
  • 2 c. flour
  • 1/4 tsp baking soda
  • 1/2 tsp salt
  • 1/2 tsp vanilla
  • up to 2 tbsp milk (I didn't actually need to add milk to my dough)
Preheat oven to 350 deg F.
In a large mixing bowl, cream together butter and sugar. Then mix in flour, baking powder and salt at a low speed, followed by the vanilla and milk, adding in the milk only as needed to make the dough come together without being sticky (it’s possible you might not need to add milk at all, I didn't). The dough should come together into a soft ball. Add in a bit of extra flour if your dough is sticky.

Roll the dough (working in two or three batches) out between pieces of wax or parchment paper to about 1/4-inch thickness (or slightly less) and use a 1 1/2-inch cookie cutter to make rounds (surprisingly, I don't actually own any cookie cutters! I used a lid to a jar of honey, and it worked perfectly.) Place on a parchment lined baking sheet and use a knife, or the end of a wide straw (a boba straw was great for this), to cut a smaller center hole. Repeat until the dough is all used (it's okay to re-roll, this dough is very forgiving (read: buttery)).

Bake cookies for 10-12 minutes, until bottoms are very lightly browned.
Cool for a few minutes on the baking sheet to firm then transfer to a wire rack to cool completely.

Topping
  • 3 c. sweetened shredded coconut, toasted
  • 11 oz chewy caramels (I say 11 oz because I got two 5.5 oz bags of Werther's Chewy Caramels)
  • 1/4 tsp salt
  • 3 tbsp milk
  • 16 oz semisweet or dark chocolate (I used one whole bag of chocolate chips just for the dipping, and then had to run out and get another bag to top the cookies! I used half of the new bag for the topping)
Preheat oven to 300 deg F.
Spread coconut evenly on a baking sheet (preferably one with sides) and toast 20 minutes, stirring every 5 minutes, until coconut is golden. Set aside.


Unwrap the caramels and place in a large microwave-safe bowl with milk and salt. Cook on high for 3-4 minutes, stopping to stir a few times to help the caramel melt. When smooth, fold in toasted coconut with a spatula.


Using the spatula or a small spoon, spread topping on cooled cookies, using about 2-3 tsp per cookie. Reheat caramel for a few seconds in the microwave if it gets too firm to work with. [NOTE: this is tricky - the caramel needs to be warm to work with, but it will be hot out of the microwave, so BE CAREFUL. I definitely burned my fingers spreading the caramel mixture on these cookies.]

While topping sets, melt chocolate in a small bowl. Dip the base of each cookie into the chocolate and place on a clean piece of parchment paper. Transfer all remaining chocolate (or melt additional chocolate, if necessary) into a piping bag or a ziplock bag with the corner snipped off and drizzle finished cookies with chocolate.

Let chocolate set completely before storing in an airtight container.

Makes about 3 1/2-4 dozen cookies.

Also, if you want recipes for more Girl Scout Cookies, you should check these out:

Saturday, September 12, 2009

Obsessions: the homemade version

I think there comes a time in any amateur chef/baker's life where they eat something delicious and then think: I wonder if I can make this myself? This has happens to me a lot, but I rarely ever think about actually doing it. Until an obsession happens.

Working in downtown SF, I am surrounded by Specialtys Bakery. My office frequently calls on Specialtys to cater meetings and events. While they have delicious salads and sandwiches, the real draw of Specialtys is their cookies. And not just any cookies: wheat germ chocolate chip cookies. Sounds weird right? But no...it should sound delicious.


These cookies are no small obsession. They are crumbly, chocolatey, and loaded with butter (in true Specialtys style) to offset any potential health benefits from the oats. There is always a race among my coworkers to get this cookie out of the assortment. We often end up splitting it many ways, so everyone can have a bit. And every time, I think - wow this is so good...can I make a cookie like it?

Challenge accepted.

I found a "reverse-engineered" recipe online and so it began. It was my intention to make a test batch this weekend for a pre-football game picnic, but the test turned out so well, that I just had to share it with you!


There is certainly something about homemade cookies. Like Linda wrote, the perfect homemade cookie is a challenge that we bakers all face. Warm, crunchy, delicious, and dare I even say...healthy?

This cookie just might be it. With a mere 1/2 cup of butter (SO unlike a Specialtys cookie), 2/3 cup of sugar, and we'll ignore the delicious chocolate chips, these puppies are smack full of good-for-you things. Things I would have never thought to put in a cookie!! Things like: whole oats, ground flax seed, and wheat germ. Are those even allowed in a cookie? Cookies are supposed to come with some remorse, right? But this is a cookie that you might just feel good about eating: guilt-free.


Homemade Specialtys Wheat Germ Chocolate Chip Cookies
Recipe adapted from Dick Koz

  • 3/4 c. old fashioned whole rolled oats
  • 1 c. whole wheat flour
  • 1/2 c. ground flax seeds (I used Bob's Red Mill Organic flaxseed meal, which can be found at most grocery stores)
  • 1/2 c. raw wheat germ (again, Bob's Red Mill wheat germ)
  • 1/2 c. sweetened coconut flakes
  • 1/2 tsp baking soda
  • 1/2 tsp salt
  • 1/2 c. butter, softened
  • 1/3 c. granulated sugar
  • 1/3 c. brown sugar
  • 1 large egg
  • 1 tsp vanilla extract
  • 1 c. mini chocolate chips (you can use regular chocolate chips, but to be true to Specialtys, I used the mini version!)
  • 1/2 c. chopped walnuts
  1. Mix oats and flour in a medium bowl. Add baking soda and salt and whisk until mixed in. Whisk in wheat germ, flax and coconut. (I actually forgot to add the coconut at this step, and mixed it in at the end with the chocolate chips...but they still turned out well)
  2. Beat butter in a large bowl with an electric mixer fitted with a paddle attachment until fluffy. Add granulated sugar, brown sugar, egg and vanilla; beat until smooth and creamy.
  3. With the mixer running, add the dry ingredients, beating on low speed until just combined. Stir in chocolate chips and walnut pieces using a wooden spoon or spatula.
  4. Chill the dough in a refrigerator for at least 1 hour. (Or as long as you can stand... if you haven't noticed already, I am an impatient baker, and I let the cookie dough chill for about 30 minutes...)
  5. In the meantime, preheat oven to 400 degrees and prepare a baking sheet (I highly recommend using a Silpat for cookies)
  6. Shape the dough into balls about 2-3 tablespoonfuls per cookie. Place at least 1 inch apart onto the prepared baking sheets.
  7. Bake cookies, until firm around the edges and golden on top, about 12 minutes. Remove baking sheets from the oven immediately and cool the cookies for 2 minutes, then transfer to wire racks with a spatula to cool.

Friday, September 11, 2009

catch up cookies


Oh, it has been quiet here for the past week, but behind the curtains, the stage hands have been manic. Life crises have been had, big important questions asked (if not answered) and yes, cookies baked. I actually cooked a lot over long weekend, but the work week came on with the vengeance of a needy child, needing specifically about 15 hours a day. I am exhausted.

It seems like forever ago that I made these - last Wednesday for a friend's going away dinner. I wanted to make something simple that I could easily carry. Sometimes I find myself riding the bus carrying a baking pan full of cupcakes carefully covered in foil so as not to muss the frosting...and fending off stares like 'What, you don't do this?' Cookies fit the easy carry/conceal bill much better.

Cookies also fall into another theme of this blog. My half of this blog could be called 'Linda faces her fears, one culinary challenge at a time.' Chocolate chip cookies are so simple, but I've never been successful making them, and somewhere along the way, I stopped trying. Valiant, I know. I've done the Tollhouse recipe, an Ina Garten recipe, a Betty Crocker recipe...and none have turned out the right taste or texture (the Ina was especially a let down). I started to think a perfect, home-made cookie was a myth. But, since July of 2008, a much heralded New York Times recipe has been making its way around foodies and food blogs, and hype has been raised. There are now so many iterations of these cookies, and the results seem to be generally good (if not allegedly phenomenal.) So more than a full year after the fact, I flagged down the band wagon, and humbly climbed on.

The 'big idea' : David Leite, the author, researched the origins, variations and secrets of this institutional cookie and the people who made/make it. He finds the perfect cookie should be crunchy around the outer edge, chewy in the center, and have a noticeable ring of transition between the two. To achieve this, the cookies must be large (5 inches!). He also recommends fancy dark chocolate, because it stands to reason that good chocolate will make a good chocolate chip cookie. There is also the juxtaposition of salty and sweet, and David's recipe calls for a sprinkle of salt over the cookies before baking. And lastly, and most interestingly, he recommends that the cookie dough should be allowed to rest for 36 hours before baking. I should know more about this since I majored in chemistry, but apparently it has something to do with letting all the flavors come together, something about the egg....


Here's my take on these guys. I didn't think I could bring myself to bake a five inch cookie. I chickened out. I didn't have fancy chocolate, but I did have many bags of organic semi-sweet chips, so I used those. I used plenty of salt in the dough, but I straight up forgot to sprinkle sea salt before baking. Whoops. BUT, I did manage to leave the dough alone for first 24 hours, then 36. And, for the first time, I produced a cookie worth writing home about.


I shaped each cookie as a 1/4 cup. They came out about 3 inches across, and I could discern the three textures mentioned in the article. They were best the day they were baked, as the centers were incredibly chewy. I also underbaked them a lot more than I thought necessary, and they came out perfect. I randomly had some caramel left over in my fridge, so for one batch, I filled the centers of the cookies with a chunk of caramel, which melted into a thin layer while baking (you can see a little leaking out in the one above). That was pretty yummy.
I'm really not sure how integral the resting period was as opposed to this simply being a great recipe, but I'm sold. It might seem fussy, but actually, it makes the process a little easier. I made the dough one night, and that didn't take very long. Then the next night, I baked them, ten minutes a batch. I feel pretty good about myself, one more thing under my belt. Will surely be making these again.

New York Times Chocolate Chip Cookies

2 cups minus 2 tablespoons (8 1/2 ounces) cake flour (I used all purpose)
1 2/3 cups (8 1/2 ounces) bread flour (I randomly had bread flour, so I did use it here)
1 1/4 teaspoons baking soda
1 1/2 teaspoons baking powder
1 1/2 teaspoons coarse salt
2 1/2 sticks (1 1/4 cups) unsalted butter
1 1/4 cups (10 ounces) light brown sugar (I used 1 1/2 cups brown, slightly less than one cup white)
1 cup plus 2 tablespoons (8 ounces) granulated sugar
2 large eggs
2 teaspoons natural vanilla extract
1 1/4 pounds bittersweet chocolate disks or fèves, at least 60 percent cacao content (I used regular chips. Shrug.)
Sea salt. (Whoops.)
1. Sift flours, baking soda, baking powder and salt into a bowl. Set aside.

2. Using a mixer fitted with paddle attachment, cream butter and sugars together until very light, about 5 minutes. Add eggs, one at a time, mixing well after each addition. Stir in the vanilla. Reduce speed to low, add dry ingredients and mix until just combined, 5 to 10 seconds. Drop chocolate pieces in and incorporate them without breaking them. Press plastic wrap against dough and refrigerate for 24 to 36 hours. Dough may be used in batches, and can be refrigerated for up to 72 hours.

3. When ready to bake, preheat oven to 350 degrees. Line a baking sheet with parchment paper or a nonstick baking mat. Set aside.

4. Scoop 6 3 1/2-ounce mounds of dough (the size of generous golf balls) onto baking sheet, making sure to turn horizontally any chocolate pieces that are poking up; it will make for a more attractive cookie. Sprinkle lightly with sea salt and bake until golden brown but still soft, 18 to 20 minutes. Transfer sheet to a wire rack for 10 minutes, then slip cookies onto another rack to cool a bit more. Repeat with remaining dough, or reserve dough, refrigerated, for baking remaining batches the next day. Eat warm, with a big napkin.
My notes on step 4: I make 1/4 cup mounds, made three inch cookies, baked for about 11 minutes per batch, and cooled minimally on the pan before transferring to the rack. I found that the bottoms continued to brown on the pan after being removed from the oven, so transferring earlier will just make for a chewier cookie. All a matter of opinion.
Related Posts Plugin for WordPress, Blogger...